Thursday, June 28, 2012

Doodles...of Kona Cotton

If you are a quilter or just plain love FABRIC then you know about Kona Cottons.  They are a solid fabric that comes in a beautiful rainbow of colors in every hue and delicious color you can imagine. 

I am dreaming tonight of those wonderful colors and the fun quilts I could make with them.  For now I will just sketch some fun designs.

Placemats for the Birds (okay, not really)


I really have fun making shop samples for Greenbaum's Quilted Forest and this cute little placemat is no exception.  I love the fun fabric from a line called "Lucy's Crab Shack" and the pattern came from a book by SamSarah Design Studio called "Can't See the Forest"...so cute!

Over the top of the placemat, I ironed on fusible Vinyl.  It's quite remarkable that it's fused with an iron, but it really works and prevents the placemat from getting messy and stained.

Placemat measures 14" x 19".

Both the fabric and the book can be purchased online or by phone at quiltedforest.com

Tuesday, June 26, 2012

Show and Tell Tuesday

 It's 8:30pm, and I just about missed posting for "Show and Tell Tuesday"...but, never fear, I am here to post my latest creation.

I used a pattern from the new book called "We Love Color: 16 Iconic Quilt Designers Create with Kona Solids" - the pattern was by Malka Dubrawsky.  I just have to say "I love her designs and her fabric". And when I saw her quilt I knew it was the one I would make to represent a fried green tomato for a challenge at Greenbaum's Quilted Forest.

I love the little quilt...I used only Kona solids, quilted it with circles, and bound it with bias binding.  The stem is done with raw edges exposed.  I thought I would be daring and put in a little touch of yellow - it was supposed to look more wavy than it does, but all it really did is make my seams not quite match, but I like it that way...I like things not so matchy, matchy.  If you want to see it in person, stop by the shop.

Quilt measures approx 50" in diameter.

Monday, June 25, 2012

Fabric Coloring with Crayons

Who doesn't love coloring? I always loved coloring as a kid and still do when my girls have a color book and crayons out. I have a friend who colors with crayons on fabric and has published a book recently on the subject. Her work is beautiful and a little more involved than I have time for right now so I decided to do some 'playing' myself and come up with a way to add some color to my fabric without too much time or fretting.
 I started with canvas (duck cloth) and stamped an image on the fabric. 
Then I colored lightly with the crayons. 
Then I placed a thin towel over the image and pressed it with a hot iron to set the color. I really had very little to no wax left on my towel. It turns out soft with no wax residue and it's washable.
Then I used the printed cloth to make a small zippered pouch. 

Tuesday, June 12, 2012

Tuesday "Show and Tell"

Today I am 'showing' a bag that one of my students made in my bag class AND it's my new pattern 'Supersized Satchel'.  It will hold anything from a sewing machine to baby items...it's a BIG bag.

made by Lisa

You did a fantastic job, Lisa!  Way to go.


Monday, June 11, 2012

Tip of the Day

Don't forget to change the needle on your sewing machine often. A new needle will make your machine run more smoothly and go through the fabric much easier. When all else fails and you can't figure out why your machine is not sewing right or sounding right...change the needle. A knick or bend in the needle can cause your machine to be out of alignment.

Wednesday, June 6, 2012

Hexagon Quilt Block Tutorial

A passion of mine is sewing by hand...when I sew by hand it takes me back to "Little House on the Prairie" days.  Hand sewing is a form of meditation to me...a time to reflect, a time to think, to dream of the future and the past.

I sat down to sew these little cutie hexagons and thought I would share the process with you.  It's not a difficult process just a little more time consuming than I had expected, it took me about 3 hours to put this block together.

25 Hexagons will make one block.
1 Center (yellow)
8 first row (orange)
16 second row (turquoise)


Start with 1" English Paper Hexagons, and 2 1/2" squares of fabric.

Using a hot iron, press edges of fabric to the back side of the paper.


Remove paper.

Using a hot iron, press hexagon on front and back to make it nice and flat.

Using a "Sewline" fabric glue pen, dab glue on the back folds to hold the folded fabric flat.


Repeat above process until all 25 hexagons are prepared. 
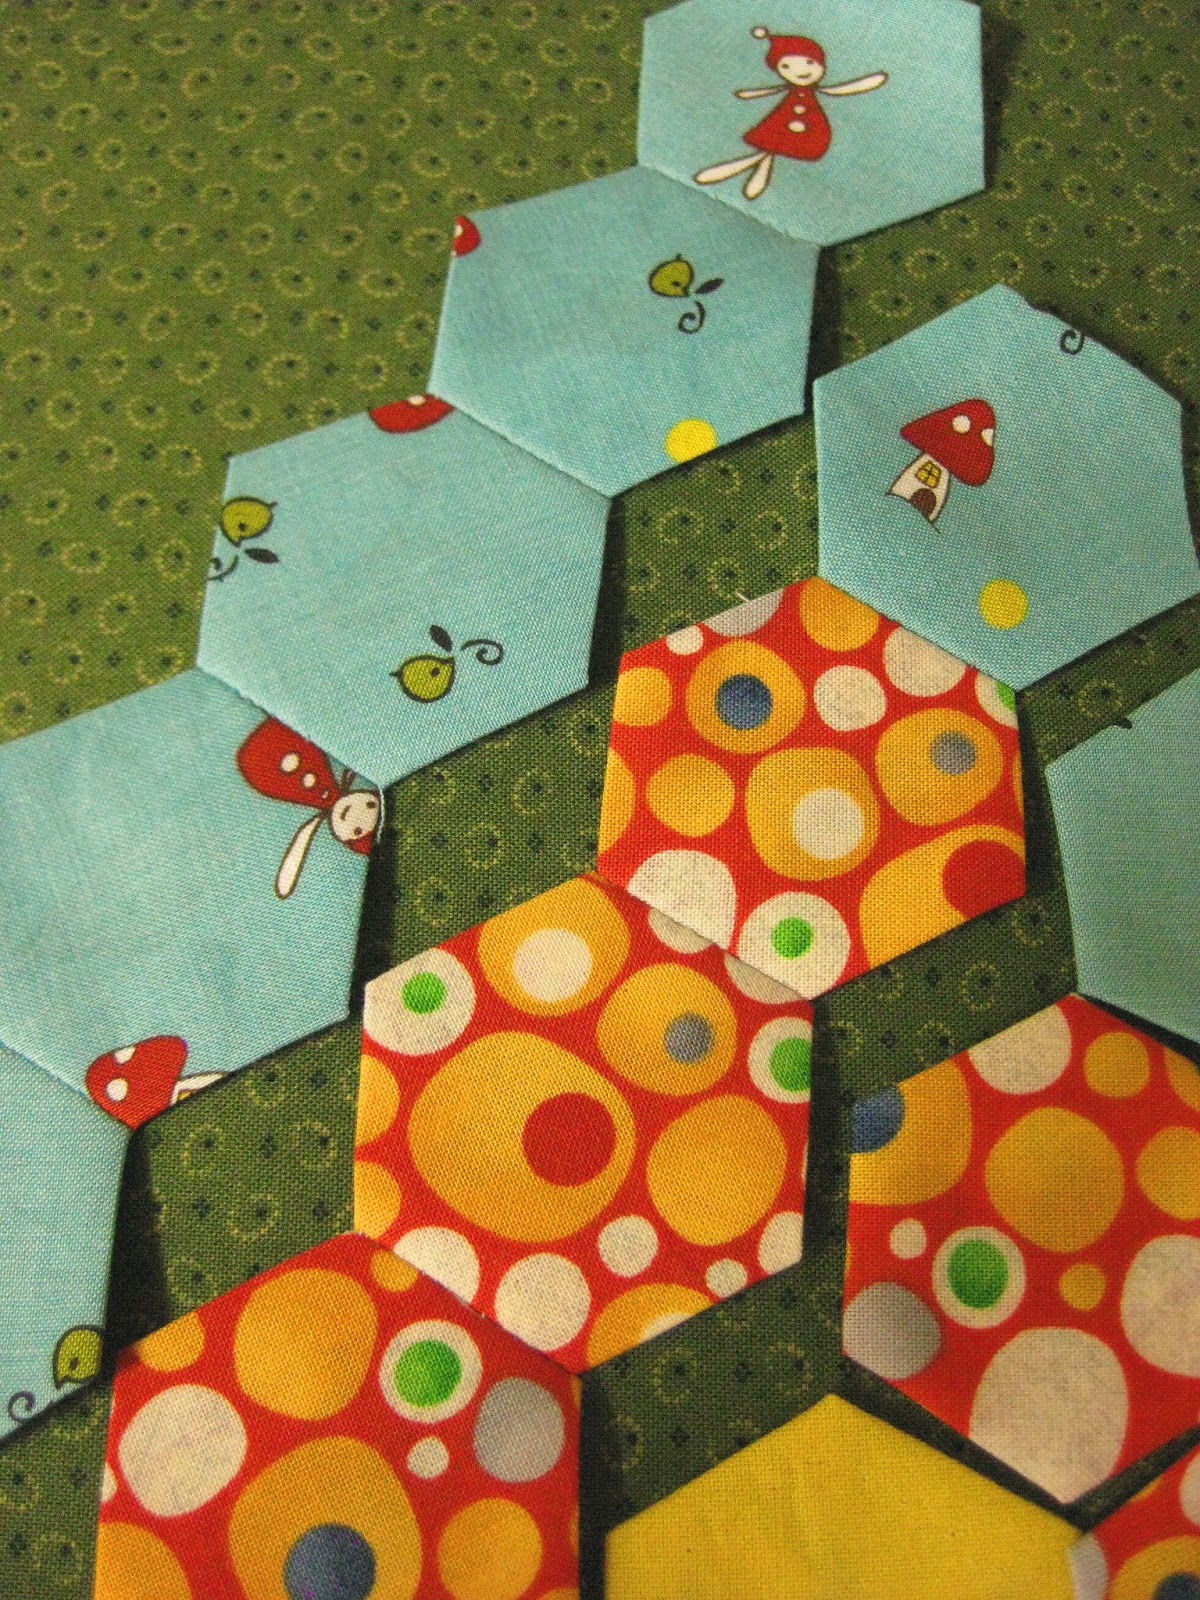
Lay hexagons out into a diamond shape.


Sew hexagons together by placing two hexagons right sides together and hand sew with needle and thread.  I used a whip stitch.
Sew hexagons in rows first.  Then sew rows together.  Just a warning: The sewing process does require a lot of knotting off thread and starting again as you sew on each new hexagon.


The back side of your block should look like this photo. After the addition of each hexagon press with hot iron to keep the block nice and flat.
  

This photo is just to show how the rows will look when you add on a new row.  It will not lay straight on the block.  As you are sewing a new row on, you will sew 1" then pivot to sew the next hexagon together.


This is the finished block...isn't it a cutie? 
Have fun and enjoy your hand sewing experience.
If you would like to purchase a kit to make this block contact Greenbaum's Quilt Forest.

Momma Hens Coop

Tuesday, June 5, 2012

Show and Tell Tuesday

Today I thought it would  be fun to 'Show and Tell' a bag I made a few years ago.
  A few years ago I started teaching a beginners quilting class called Nine Patch/Hourglass and to get myself familiar with the pattern and feel comfortable teaching it...I made 8 of the quilts.  It was very fun to make so many of the same quilt pattern because with different fabric used every time they each were unique...and guess what everyone got for Christmas that year ;)
So...by the 9th time of making the quilt I decided to turn the blocks into a bag instead...by then, I felt I had the hang of making it and I didn't need anymore quilt gifts for Christmas.
The handles (bought at Joann Fabrics) are bamboo and are placed onto the tabs after the bag is put together.  The little flap has a magnetic snap and I put a big pocket on the inside.  The blocks measure 6" each so the overall bag is about 24" square and 3" wide.  It's a fun bag to carry if I need to tote some books or carry my sewing supplies to class.